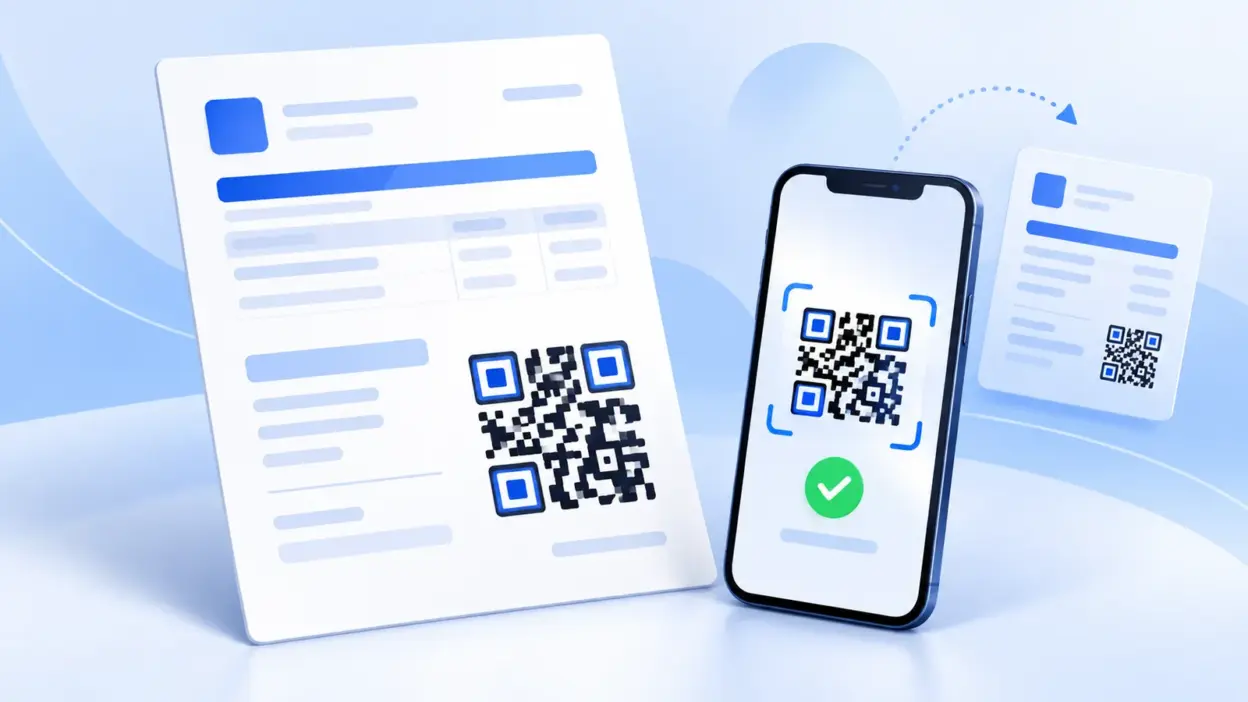
An invoice with upi qr gives your client a scan-to-pay option alongside the amount due, so they do not have to type your UPI ID manually. You can create one free, add your business and tax details, download a PDF, and send it by email or WhatsApp in a few minutes.
This guide shows the complete workflow and explains what changes when you send many invoices and need payments matched to orders automatically.
What you need before creating the invoice
Keep these details ready:
- Your business name, address, phone number and email address.
- Your UPI ID, copied from the merchant account where you want to receive the money.
- The client’s name and billing address, if you include them on your invoices.
- An invoice number, issue date, payment terms and due date.
- Each item or service, quantity, rate, applicable tax, discount and shipping charge.
- Your logo, if you want to add one to the PDF.
Select INR when you want the invoice to include a UPI payment QR. The generator also supports other currencies, but its UPI QR feature is available with Indian Rupees.
UPI QR integration stores merchant information such as the UPI ID and amount in the payment request. NPCI describes this as a QR-based UPI integration in its official UPI FAQ. The person paying should still check the payee name and amount shown in their UPI app before confirming.
Step 1: Open the free invoice generator
Starting with the right currency makes the payment section appear in the correct place.
- Open the PaymentSetu free invoice generator.
- In the currency selector, choose INR (₹) – Indian Rupee.
- Add your company name, address and contact details in the seller section.
- Upload your logo if you use one, then check the invoice preview as you work.
The page runs in your browser and does not require an account. The tool is designed to keep invoice information in the browser, so download the finished PDF and keep your own backup if the invoice is important for your records.
Success looks like: the invoice preview shows your business details, the currency is ₹, and a UPI Payment QR panel is visible in the sidebar.
Step 2: Add the client and invoice details
Complete the document first; the QR should represent the final balance due, not an earlier subtotal.
- Enter the client’s name and billing address under Bill To.
- Add an invoice number and date. Use a numbering pattern that makes it easy to find the document later.
- Add payment terms and a due date if the client is allowed time to pay.
- Add a purchase order number when the client has given you one.
- Add a shipping address only when it is different from the billing address.
- Add a line for each product or service. Enter the description, HSN/SAC when relevant, quantity and rate.
Use clear descriptions rather than internal shorthand. For example, write “Website maintenance – September” instead of “W/S M-09”. That description will be visible to the person approving the invoice and can help you match the payment to the right work.
Add taxes, discounts and shipping charges in their own fields. Review the subtotal and total before moving to the QR section. If you have already received part payment, enter the amount paid so the balance due reflects what is still payable.
Success looks like: the total and balance due match your agreed price, and the invoice contains enough detail for the client to recognise the work.
Step 3: Add your UPI ID and QR code
The UPI ID tells the payment request where the client should pay; the invoice amount is taken from the balance due.
- Find the UPI Payment QR panel in the sidebar.
- Enter the UPI ID for the merchant account that should receive this invoice payment.
- Select Show QR code on invoice.
- Keep the UPI ID visible as plain text on the invoice as a second way for the client to confirm the payee.
- Look at the invoice preview and confirm that the QR is present and the displayed balance due is correct.
The generator creates the QR from the invoice’s balance due. This is useful when a client is paying one specific invoice because the amount is already prepared in the payment flow. If you change a line item, tax, discount or amount paid later, check the QR amount again before downloading.
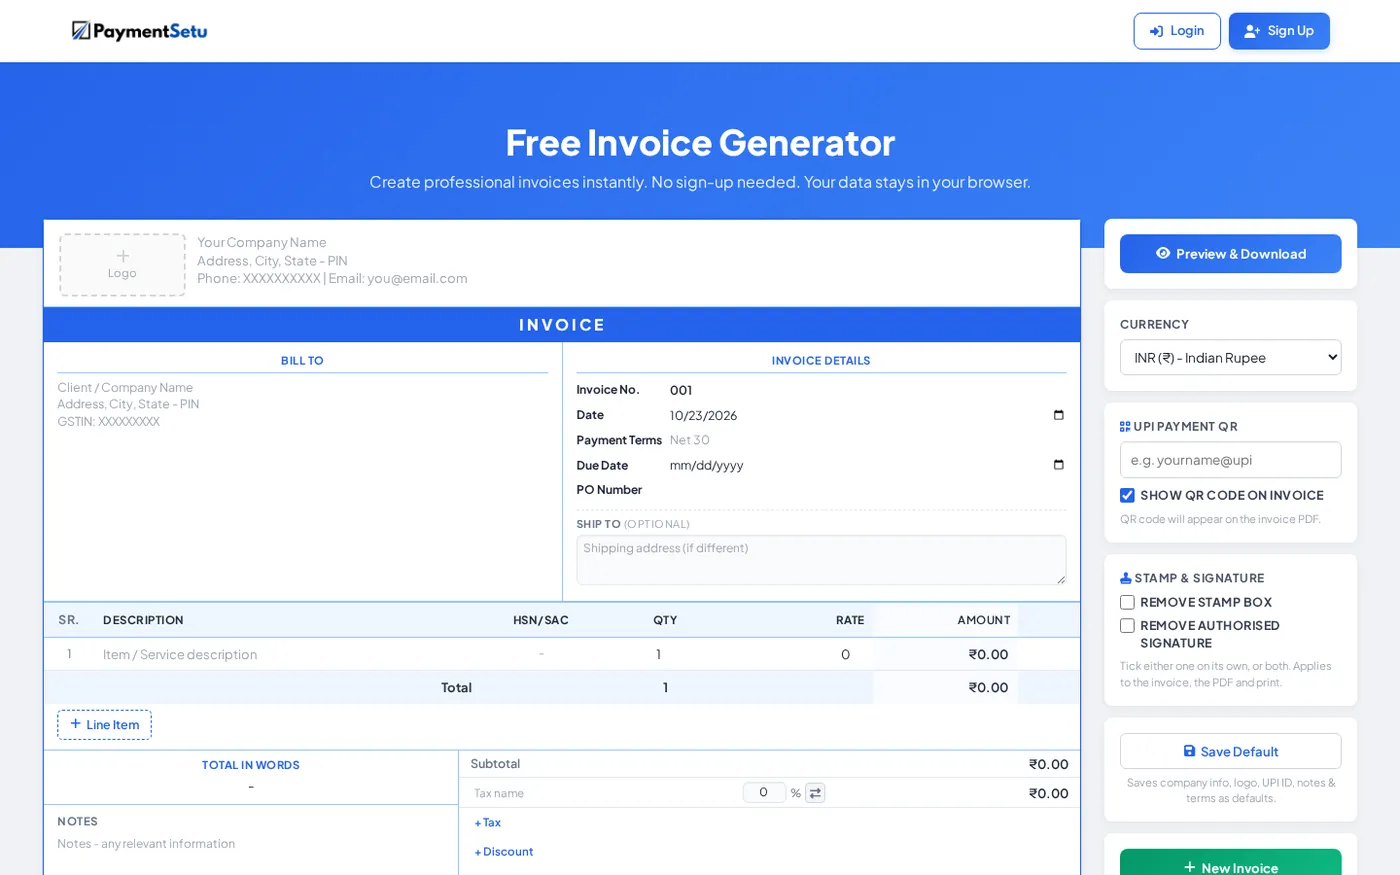
Success looks like: the QR appears on the invoice preview, the UPI ID is yours, and the amount in the payment screen will match the final balance due.
Step 4: Preview and check the payment details
A PDF can be forwarded many times, so one careful check prevents a wrong-payee or wrong-amount problem.
Click Preview & Download and inspect the invoice at the size your client will see. Check these items:
| Check | What to confirm |
|---|---|
| Payee | The UPI ID and payee name belong to your business or merchant account. |
| Amount | The QR amount matches Balance Due, not just the subtotal. |
| Invoice identity | Invoice number and date are readable. |
| Line items | Descriptions, quantity, rate and tax entries are correct. |
| QR quality | The code is not cropped, stretched or covered by another element. |
| Contact details | Your client can reach you if they need to ask about the invoice. |
On a phone, open the PDF on one device and scan it with a UPI app on another device. If you only have one phone, print the invoice or display the PDF on a laptop for the scan test. Do not confirm a payment while testing unless you intend to make a real transfer.
Success looks like: the PDF preview is readable, the QR is fully visible, and a scan opens a payment screen showing the intended payee and amount.
Step 5: Download the PDF and send it
The PDF keeps the layout together when you share the invoice across devices and apps.
- From the preview window, choose Download PDF.
- Rename the file with a consistent pattern such as
INV-2026-014-client-name.pdf. - Open the saved file once to confirm it is not blank or missing the QR.
- Send it through your normal email thread or WhatsApp conversation.
- Tell the client to scan the QR, check the payee name and amount, complete the payment in their UPI app, and share the UTR only if you need it for reconciliation.
For an overdue invoice, send the existing PDF again only after checking that the amount is still due. If the amount has changed, create a corrected invoice and label the old one as cancelled or superseded in your own records according to your bookkeeping process.
Success looks like: the client receives one clearly named PDF, can scan it, and knows which invoice the payment is for.
Step 6: Verify the payment before marking the invoice paid
The QR makes payment easier; it does not replace checking whether the money reached the intended merchant account.
After the client says they have paid:
- Check the merchant account connected to the UPI ID printed on the invoice.
- Match the credited amount to the invoice balance.
- Compare the transaction time, payer details and UTR with the invoice and client message.
- Mark the invoice paid only after the credit appears in your own account.
- Save the PDF and payment reference together for later reconciliation.
Treat a screenshot as a notification from the client, not as proof of settlement. If the amount is wrong or the credit is not visible, ask the client to confirm the transaction status in their UPI app and contact the relevant bank or UPI provider through its normal support route.
Sending many invoices? Auto-match the payments
The free generator is useful when you create and review invoices one at a time. If your business sends many invoices, manually checking every credit and UTR can become a separate daily task.
PaymentSetu is a payment verification service, not a payment gateway. The customer pays directly to your own Paytm Business or PhonePe Business merchant account. PaymentSetu matches the UTR and amount to the dynamic QR or order and can send a webhook to your software after verification; it does not hold the money.
That workflow is useful for online stores, service businesses and hosting companies that already have an order or invoice system. You can connect it to a WooCommerce UPI checkout, use a WHMCS gateway module, or integrate through the API and HMAC-signed webhooks if you have a custom application.
For a few invoices, the free PDF workflow is enough: create, download, send and check the credit. For recurring or higher-volume collections, create a PaymentSetu account to connect payment verification to the order or invoice status in your system.
Static QR versus invoice-specific QR
A separate QR can be useful at a retail counter or on a general payment instruction page. PaymentSetu’s free UPI QR code generator lets you make a printable QR with your UPI ID and optional amount.
An invoice-specific QR is better when each document has a different amount. The invoice carries the customer’s name, line items, invoice number and balance due in one place, and the QR can prepare the amount for that particular bill. Whichever QR you use, show the UPI ID in text and ask the payer to check the payee before confirming.
Common problems and fixes
The UPI QR panel is not visible
Check that the currency is set to INR. Then enter a UPI ID in the UPI Payment QR panel and enable Show QR code on invoice.
The QR shows the wrong amount
Review taxes, discounts, shipping and amount paid. The QR uses the balance due, so update the invoice and preview it again before downloading a replacement PDF.
The client cannot scan the PDF
Ask the client to open the PDF at a larger size or scan the printed copy. Confirm that the QR is not cropped, blurred or covered, and provide the UPI ID as text so they can verify the payee.
The client says the payment is complete, but it is not in the account
Do not mark the invoice paid from a screenshot alone. Check the merchant account for the credit, ask for the UTR and amount, and reconcile them against the invoice.
FAQ
How do I add a UPI QR code to an invoice?
Open the free invoice generator, choose INR, enter your invoice details and add your UPI ID in the UPI Payment QR panel. Enable Show QR code on invoice, preview the document and download the PDF.
Can I create an invoice with UPI QR for free?
Yes. PaymentSetu’s browser-based invoice generator is free and does not require sign-up. It supports PDF download and embeds a UPI QR when INR is selected and a UPI ID is entered.
Does the QR include the invoice amount?
The QR is generated using the invoice balance due. Recheck the balance after changing tax, discount, shipping or amount paid, then download the latest PDF.
Can customers pay the invoice using any UPI app?
The customer can scan a UPI QR with a UPI-supported payment app. They should confirm the payee name and amount displayed by the app before authorising the payment.
How do I automatically match UPI payments to invoices?
For higher-volume workflows, connect your own Paytm Business or PhonePe Business merchant account to PaymentSetu. Its verification service matches the UTR and amount to the relevant order or dynamic QR and can notify your application with a webhook.