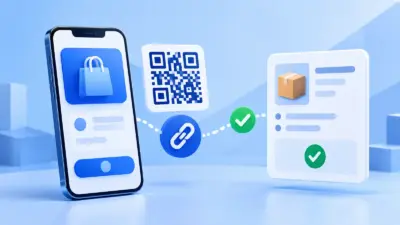
upi payment integration in flutter is safest when Flutter starts the payment but your server owns the order and confirmation. This guide connects a Flutter checkout to PaymentSetu with a server-created order, a upi://pay Intent, a status check when the customer returns and an HMAC-verified webhook.
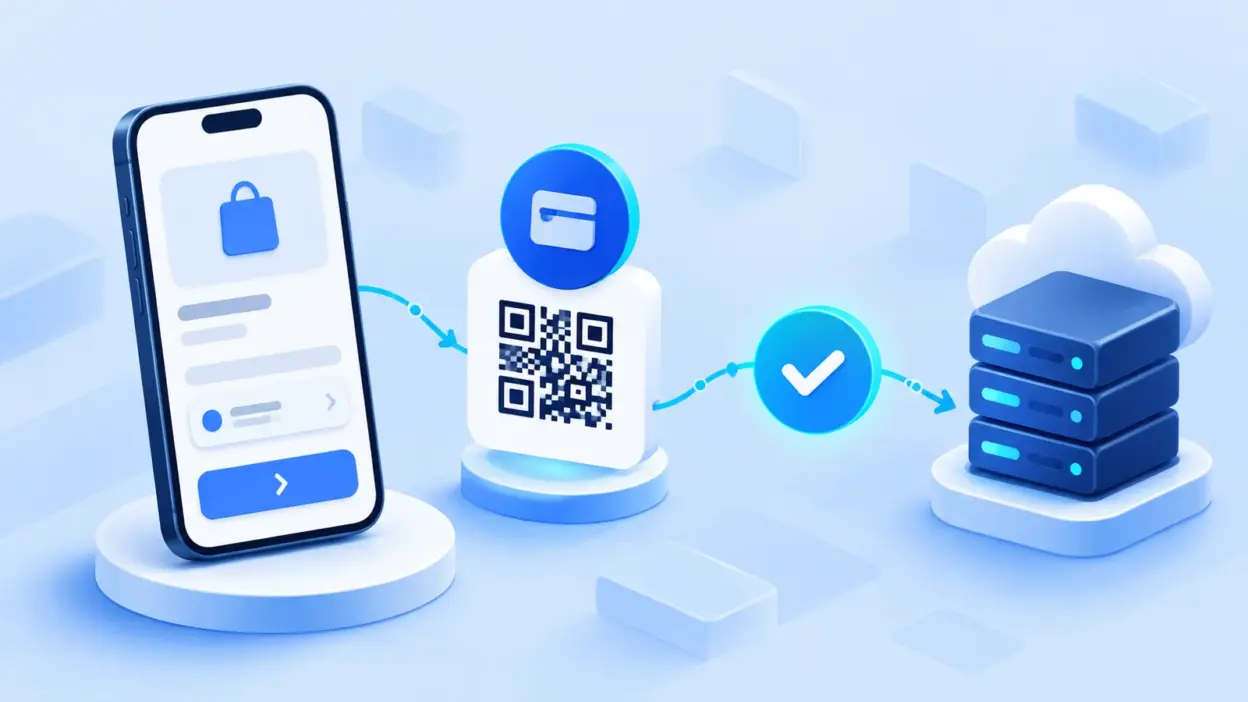
Architecture: app, your server, PaymentSetu
The mobile app should never decide that an order is paid. It can open a UPI app and display the current state, but only your backend should create the order, receive the verification event and fulfil the purchase.
The flow is:
- Flutter sends your own cart or booking ID to your backend.
- Your backend validates the cart, creates a unique
client_txn_idand callsPOST /api/create_orderwith the exact amount. - Your backend returns only the payment details needed by Flutter. The API key stays on the server.
- Flutter opens the returned UPI Intent with
url_launcher. - The customer reviews the payee and amount in a UPI app and authorises the payment.
- PaymentSetu matches the payment in your connected Paytm Business or PhonePe Business merchant account and sends your backend an HMAC-signed webhook.
- Your backend marks the order paid once. Flutter checks your backend when the app becomes active again.
This is a verification flow, not a payment gateway flow. The customer pays directly into your own connected merchant account; PaymentSetu matches the payment to the order and notifies your system. NPCI lists Intent as one of the UPI merchant integration modes in its UPI FAQ.
What you need before coding
Why: keeping ownership of the order, amount and secrets clear prevents a client-side callback from becoming a false payment confirmation.
Prepare these items:
- A Flutter app with a checkout screen and a server-side API you control.
- A database order with a unique reference, expected amount and
pending/paidstatus. - A PaymentSetu account, API key, webhook secret and connected Paytm Business or PhonePe Business merchant account.
- A public HTTPS webhook URL, such as
https://api.example.com/webhooks/paymentsetu. - The
url_launcherpackage. The current package page documents Android and iOS support and thelaunchUrl(Uri)API; check its latest setup notes when you add it.
Add the package:
flutter pub add url_launcherKeep the API key and webhook secret in server environment variables. A Flutter release can be inspected or reverse-engineered, so a secret embedded in Dart code is not a secret.
Step 1: Create the order server-side
Why: the server must calculate the amount and create the reference before Flutter opens a payment app.
Flutter should send a cart ID, not a price. Your backend loads the cart from its database, checks that it is still payable, saves a pending order and calls PaymentSetu. The endpoint is API-key authenticated:
// Example Express-style server code. Keep this route on your backend.
app.post('/checkout/create-upi-order', async (req, res) => {
  const cart = await carts.findPayable(req.body.cartId);
  if (!cart) return res.status(404).json({ error: 'Cart not found' });

  const clientTxnId = `ORDER-${crypto.randomUUID()}`;
  await orders.insertPending({
    clientTxnId,
    cartId: cart.id,
    amount: cart.total,
  });

  const response = await fetch(
    `${process.env.PAYMENTSETU_API_BASE}/api/create_order`,
    {
      method: 'POST',
      headers: {
        Accept: 'application/json',
        'Content-Type': 'application/json',
        // Use the API-key header format shown in your PaymentSetu account.
        Authorization: `Bearer ${process.env.PAYMENTSETU_API_KEY}`,
      },
      body: JSON.stringify({
        client_txn_id: clientTxnId,
        amount: cart.total.toFixed(2),
        webhook_url: 'https://api.example.com/webhooks/paymentsetu',
      }),
    },
  );

  if (!response.ok) {
    return res.status(502).json({ error: 'Could not create payment order' });
  }

  const payment = await response.json();
  // Map the response to your own stable mobile contract. Do not expose the API key.
  return res.json({
    clientTxnId,
    amount: cart.total.toFixed(2),
    upiUri: mapPaymentResponseToUpiUri(payment),
  });
});
The function mapPaymentResponseToUpiUri is deliberately an application boundary: use the payment details returned by the PaymentSetu API instructions for your account. If the response gives you a hosted payment URL or QR data instead of a UPI URI, return that value and render or open it according to the documented response. Do not guess response keys or put the PaymentSetu credential in Flutter.
Use a server-generated reference and save it before the network call. If the request times out, your retry logic must reuse the same reference or reconcile it before creating another order. A duplicate reference is easier to reason about than two pending orders for one cart.
Success looks like this: your database has one pending order, the server has a unique client_txn_id, and Flutter receives an opaque upiUri plus the same reference and amount.
Step 2: Build and open the UPI Intent in Flutter
Why: the Intent should pre-fill the merchant, amount and order note, while the customer still confirms the payment inside their chosen UPI app.
If your backend returns a complete URI, parse it and launch it. If it returns separate fields, construct the URI with a query string that encodes every value. url_launcher specifically recommends a custom encoding approach for non-HTTP schemes because the generic queryParameters constructor can encode spaces as +.
import 'package:flutter/material.dart';
import 'package:url_launcher/url_launcher.dart';

String encodeQueryParameters(Map<String, String> params) {
  return params.entries
      .map((entry) =>
          '${Uri.encodeComponent(entry.key)}=${Uri.encodeComponent(entry.value)}')
      .join('&');
}

Uri buildUpiUri({
  required String payeeVpa,
  required String payeeName,
  required String amount,
  required String orderReference,
}) {
  return Uri(
    scheme: 'upi',
    host: 'pay',
    query: encodeQueryParameters({
      'pa': payeeVpa,
      'pn': payeeName,
      'am': amount,
      'cu': 'INR',
      'tn': orderReference,
      'tr': orderReference,
    }),
  );
}

Future<bool> openUpiPayment(Uri upiUri) {
  return launchUrl(upiUri);
}
In a real app, payeeVpa and payeeName should come from the trusted order response or your configured merchant details, not from editable checkout text. Display the same amount and a recognisable order reference on your payment screen before the customer taps Pay by UPI.
Call the method from a user action and handle false:
Future<void> startPayment(BuildContext context, Uri upiUri) async {
  final opened = await openUpiPayment(upiUri);
  if (!context.mounted) return;

  if (!opened) {
    ScaffoldMessenger.of(context).showSnackBar(
      const SnackBar(content: Text('Could not open a UPI app. Try the QR option.')),
    );
  }
}
Android 11 and later can require package-visibility entries when you call canLaunchUrl. The url_launcher documentation also notes that canLaunchUrl can return false even when a launch may work, so this example attempts launchUrl and handles failure rather than disabling the button after a possibly unreliable pre-check. Keep a QR and UPI ID fallback for devices where no installed app claims the upi scheme. On iOS, the hand-off likewise depends on an installed app and its URL-scheme support.
Success looks like this: a tap opens a compatible UPI app with the intended payee and amount visible, and a failed hand-off leaves the order pending while offering a QR or manual fallback.
Step 3: Poll order_status while the user returns
Why: returning from a UPI app is only a navigation event. It is not proof that the customer completed, cancelled or even reached the final payment screen.
Flutter can observe the resumed lifecycle state through WidgetsBindingObserver. The Flutter lifecycle documentation describes didChangeAppLifecycleState; use it to ask your own backend for the order state.
class PaymentPageState extends State<PaymentPage>
    with WidgetsBindingObserver {
  bool checking = false;
  String orderState = 'pending';

  @override
  void initState() {
    super.initState();
    WidgetsBinding.instance.addObserver(this);
  }

  @override
  void dispose() {
    WidgetsBinding.instance.removeObserver(this);
    super.dispose();
  }

  @override
  void didChangeAppLifecycleState(AppLifecycleState state) {
    if (state == AppLifecycleState.resumed) {
      checkOrderOnServer();
    }
  }

  Future<void> checkOrderOnServer() async {
    if (checking) return;
    setState(() => checking = true);
    try {
      final result = await api.getOrderStatus(widget.clientTxnId);
      if (!mounted) return;
      setState(() => orderState = result.status);
    } finally {
      if (mounted) setState(() => checking = false);
    }
  }
}
api.getOrderStatus should call your backend. Your backend then calls GET /api/order_status/{client_txn_id} with the API key and returns a small, safe response such as pending, paid or failed. Never call PaymentSetu directly from the app.
Use a modest retry schedule while the payment screen is visible—for example, immediately on resume and then after a few seconds if the order is still pending. Stop after a bounded number of checks and let the customer tap Check again. The webhook remains the primary confirmation path; polling is a reconciliation fallback.
Success looks like this: reopening the app refreshes the order from your backend, but the app never changes a pending order to paid merely because the UPI app returned.
Step 4: Handle the webhook on your backend
Why: the signed webhook is the server-side event that lets you confirm the payment without trusting a mobile callback or screenshot.
Your webhook handler should process the raw request body in this order:
- Accept only the expected HTTP method and content type.
- Read the raw bytes and verify the HMAC signature with your webhook secret. Use the header name, algorithm, digest format and any timestamp rule specified in your PaymentSetu account.
- Parse JSON only after the signature passes.
- Find the local order by
client_txn_idand compare the received amount with the amount saved before checkout. - Record the UTR or transaction reference when present. See the UTR number guide if your support team needs a plain-language reference.
- Make the paid transition idempotent. A repeated event must not deliver the product twice.
- Return a 2xx response after the event is safely recorded.
The signature check has to use the exact raw bytes. A typical HMAC-SHA256 comparison has this shape, but treat it as a pattern—not a replacement for the signature contract in your account:
const expected = crypto
  .createHmac('sha256', process.env.PAYMENTSETU_WEBHOOK_SECRET)
  .update(rawBody)
  .digest('hex');

const valid =
  receivedSignature &&
  expected.length === receivedSignature.length &&
  crypto.timingSafeEqual(
    Buffer.from(expected),
    Buffer.from(receivedSignature),
  );

if (!valid) return res.status(401).json({ error: 'Invalid signature' });
Do not fulfil from a success string supplied by Flutter. The trusted transition is a transaction in your database that matches the signed event to the pending order, checks the amount and ignores an order already marked paid.
Success looks like this: a valid webhook updates one matching order exactly once, an invalid signature is rejected, and a duplicate delivery returns safely without duplicate fulfilment.
Step 5: Verify the complete Flutter flow
Why: mobile app switching, server callbacks and database updates happen at different times, so test the sequence rather than only the button.
Run this checklist in a test environment:
- Start a checkout and confirm that the server—not the app—chooses the amount and creates the pending row.
- Confirm the response to Flutter contains no API key or webhook secret.
- Tap the Intent and check the payee name and amount before confirming in the UPI app.
- Return to Flutter and confirm the screen remains pending until your backend reports a verified state.
- Inspect your webhook logs for the
client_txn_id, amount and UTR, without logging secrets or unnecessary personal data. - Deliver the same signed webhook twice and confirm that fulfilment runs once.
- Change the amount in a test payload and confirm that the handler rejects the mismatch.
- Test the QR or UPI ID fallback on a device without a suitable Intent handler.
- Monitor verification credits with
GET /api/check_creditsso a production app can show an operational warning to staff before credits run out.
For a custom Flutter checkout, PaymentSetu Pro is ₹999 per 30 days with 1,000 credits; one credit represents one successful payment verified. The plan also includes Dynamic QR, webhooks, REST API access, a unified dashboard, real-time notifications and the WooCommerce/WHMCS plugins for businesses that use those platforms. PaymentSetu charges 0% commission on the payment, and the money goes directly to your own connected merchant account. See the current plans before choosing a plan.
If you are comparing this custom route with a server-rendered implementation, the UPI payment integration in PHP guide covers the same order, webhook and status concepts in PHP. The key rule is unchanged: verify the payment on the server before you deliver anything.
For the wider server-side pattern behind a custom checkout, see how to accept UPI payments on a website without a gateway. The Flutter version uses the same order reference and verification boundary, with a mobile Intent in place of a browser payment screen.
Common errors and fixes
The UPI app does not open. The device may not have an app registered for the upi scheme, or the URI may contain an unencoded space or special character. Build the query with component encoding, handle the launchUrl result and show a QR or UPI ID fallback.
canLaunchUrl says false on Android. Package visibility rules can affect canLaunchUrl, especially on Android 11 and later. Follow the url_launcher manifest guidance if you need the pre-check, but still handle the actual launchUrl result.
The app says paid after returning, but the order is pending. That is expected until your server receives and accepts the webhook or confirms the status through order_status. Do not treat the app-resume event or a UPI app result as the payment authority.
The webhook signature never matches. Hash the raw request bytes, not a parsed and re-serialised JSON object. Check the secret, header name, algorithm, digest encoding and timestamp construction against the account instructions.
One payment fulfils twice. Add a unique constraint on your internal order reference or event/UTR reference and update the order inside a database transaction. Return success for a safely handled duplicate instead of running fulfilment again.
The order amount is wrong. Calculate the amount from server-side product data and compare the webhook amount with the saved value. Never trust a price sent by the mobile client.
FAQ
Can Flutter integrate UPI without putting a payment key in the app?
Yes. Flutter can call your backend, receive the order-specific payment details and open the UPI Intent. Keep order creation, API-key authentication, status calls and webhook verification on your server.
Is returning from the UPI app a successful payment callback?
No. It only tells you that control returned to your app. Ask your backend for the current order state and wait for the verified webhook or a trusted server-side status response before fulfilling the order.
Does this work on Android and iOS?
The Flutter url_launcher API supports both platforms, but the actual upi://pay hand-off depends on a compatible installed UPI app and its URL-scheme support. Provide a QR and readable UPI ID fallback, and test on the device types your customers use.
Should the app poll PaymentSetu directly?
No. The app should poll your own backend with client_txn_id. Your backend can call GET /api/order_status/{client_txn_id} using the protected API key, while the webhook remains the normal confirmation path.
What is the difference between this and a payment gateway integration?
In this flow, the customer pays directly to your own connected Paytm Business or PhonePe Business merchant account. PaymentSetu verifies the payment and sends a webhook; it is not a payment gateway and does not hold the funds.
The essential pattern is small: create the order on your server, open the Intent from Flutter, check status on resume and trust only the verified webhook or server-side status. That separation gives your mobile checkout a clear recovery path when the customer changes apps or the network returns at a different time.
DONE upi-payment-integration-flutter words=2115