How to accept payment in google form is a common question for event organisers, tutors, clubs, freelancers and small businesses in India. Google Forms can collect registration details, but you need a separate UPI payment step and a reliable way to confirm that the money actually reached your merchant account.
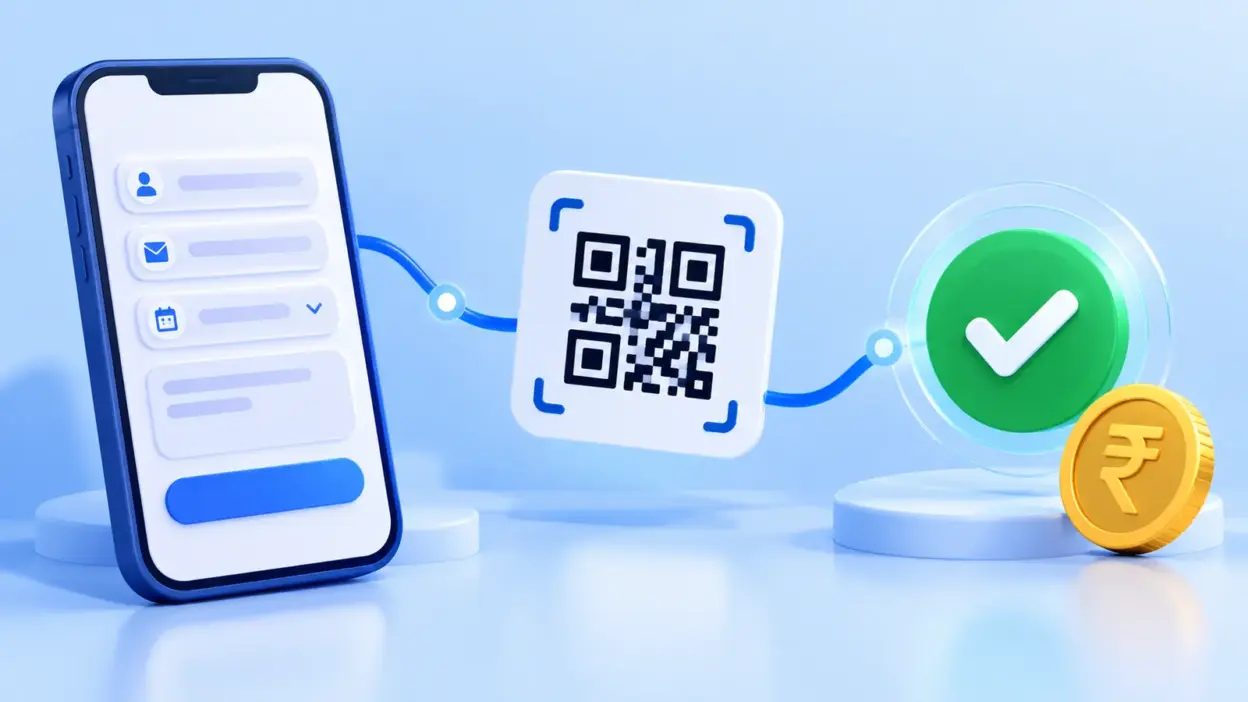
The simplest setup is a static UPI QR with a UTR field in the form. For automatic matching, create a unique order and dynamic QR for each respondent, then use a verified webhook to update the payment status. This guide explains both options and when to use each one.
Can Google Forms take payments?
Google Forms is a form and response-collection tool, not a payment checkout. Its built-in features let you publish a form, customise the confirmation message, collect responses and send them to Google Sheets; they do not confirm that a UPI transfer was credited to your account.
You can still use Google Forms for paid registrations by connecting it to a UPI QR or a separate payment-verification flow. Google’s current instructions cover publishing and sharing a form and viewing responses in Google Sheets, which are the two Google features used in the workflows below.
What you need before you start
Prepare these items before editing the form:
- A Google account that can create and publish the form.
- Your business name and the UPI ID of your own merchant account.
- The amount to collect, or a clear rule for calculating it from a form answer.
- A response destination, preferably a linked Google Sheet.
- A payment status column that you will update only after verification.
For the automatic method, you also need a PaymentSetu account and a connected Paytm Business or PhonePe Business merchant account. The customer pays directly to your own merchant account; PaymentSetu verifies the transaction and sends the notification needed to update your registration.
Step 1: Build the Google Form
Start with the registration data you need, then make payment status easy to reconcile later.
- Create a new Google Form and add the respondent’s name, email address and mobile number as required questions.
- Add the registration choice, such as event date, course batch or service package. If each choice has a different price, record the price in your own order logic rather than trusting a value typed by the respondent.
- Add an optional “Reference or note” question if you want the respondent to mention an order number. Do not use a typed name or note as proof that money was received.
- Open the Responses tab and link the form to a new or existing Google Sheet.
- Publish the form and copy its responder link. Use Settings → Presentation → Confirmation message for general next steps, such as “Complete the UPI payment shown on the next page.”
Success looks like this: a test response appears in the form and its linked sheet, with the email and selected registration option stored in separate columns.
Google Forms also supports response validation for text and number fields. Use it for formatting, such as checking a phone number or limiting a quantity; validation only checks what someone typed and does not verify a bank transaction. See Google’s response validation guide for the available rules.
Step 2: Add a static UPI QR for a simple form
This is the free method for a small number of registrations or a fixed-price activity. It gives the payer a QR to scan and gives you a UTR to search for manually.
- Open PaymentSetu’s free UPI QR code generator.
- Enter your UPI ID and payee or business name.
- Enter a fixed amount if every respondent pays the same price. Leave the amount open only when the payer genuinely needs to enter it.
- Add a short note such as “June workshop”. Keep the note useful for your own reconciliation.
- Select Generate QR Code, then download the PNG.
- In Google Forms, add an image to the payment section and upload the QR. Place a short instruction below it: “Pay the exact amount, then enter the UTR from your UPI app.”
- Add a required short-answer question named UPI transaction reference / UTR.
- Add a final confirmation message telling the respondent that the registration is pending until you verify the payment in your merchant account.
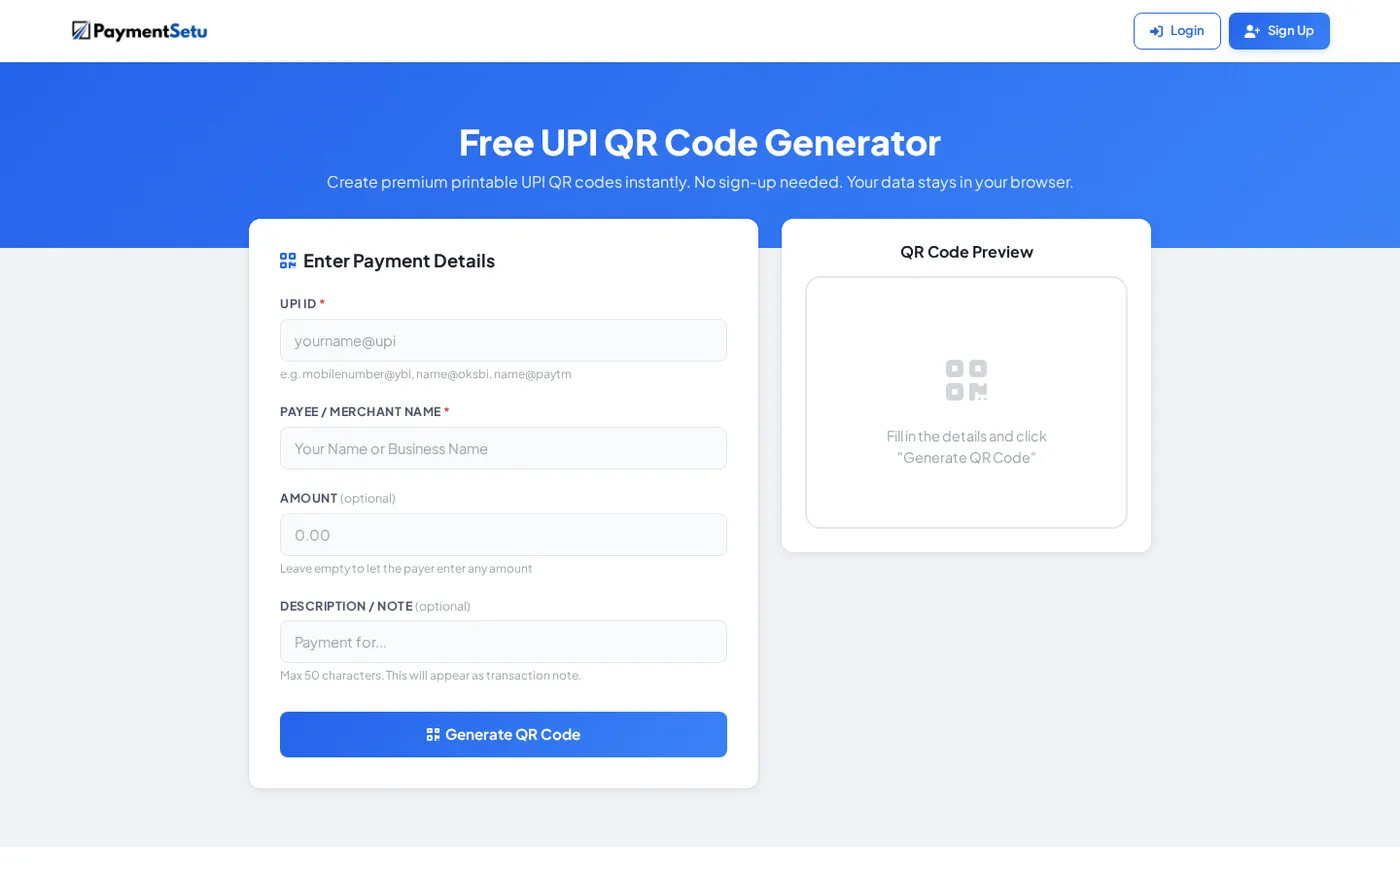
The generator runs in the browser and can create a printable QR without sign-up. The QR sends money to the UPI ID you entered; it does not automatically connect the Google Form response to a bank credit. That matching step is still yours to perform.
For a manual check, search your merchant account for the UTR and confirm the amount, beneficiary and date before marking the row as paid. NPCI describes the transaction reference number as a unique reference used for reconciliation; its UPI account-statement standard explains why this reference is important.
If you want to share a payment destination outside the form as well, see how to create a UPI payment link. Keep the link and the QR tied to the same merchant account so your reconciliation process has one clear source of truth.
Why a payment screenshot is not enough
A screenshot can show that someone opened a UPI app or started a transfer. It does not, by itself, prove that the correct amount was credited to your merchant account. Images can also be old, edited, duplicated or attached to the wrong registration.
Treat the screenshot as a support document at most, not as the approval signal. Your approval rule should be:
Mark paid only when the UTR and amount match a credit in your own merchant account.
For low volume, you can perform that check in the bank or merchant-account history and update the Sheet. For a form that receives many registrations, manual matching becomes slow and makes it harder to keep one response tied to one payment. A unique order and an automated webhook solve that identity problem.
If you have not yet set up the receiving account, start with this guide to opening a UPI merchant account in India, then return here to connect the form workflow.
Step 3: Use a dynamic QR and PaymentSetu for automatic verification
Use this method when each registration has a different amount, when you need a paid-only confirmation, or when several people may submit the same form at nearly the same time. Every respondent receives a payment request tied to one form response instead of sharing one QR with everyone.
1. Connect your merchant account
Create a PaymentSetu account and connect your Paytm Business or PhonePe Business merchant account. PaymentSetu is a payment verification service, not a payment gateway: the customer pays directly into your merchant account, while PaymentSetu matches the payment and sends a webhook.
Choose the Starter plan if you need to verify up to 100 successful payments in 30 days. It is ₹399 per 30 days and includes dynamic QR generation, webhooks, API access and a unified dashboard. The product card above uses the same current plan details.
2. Create one order per form response
When the form is submitted, your automation layer should create a PaymentSetu order with:
- a unique
client_txn_idbased on the form response ID; - the exact amount for the selected registration;
- the respondent’s email or internal registration reference as metadata;
- your return or notification details, where your integration needs them.
The API flow uses POST /api/create_order with API-key authentication. Keep the API key on a server-side integration or a protected automation environment. Never place it in a Google Form question, a public QR image or browser code that respondents can inspect.
The order should produce a unique dynamic QR or payment link for that respondent. Send that link by email or show it on a page controlled by your automation. A single generic QR is not a substitute for a per-order identifier when you want automatic matching.
3. Trigger the order after submission
Google Apps Script can run an installable form-submit trigger. Google’s FormResponse reference exposes getId() for the submitted response, and the trigger documentation shows the onFormSubmit() pattern.
The trigger logic is:
function installTrigger() {
  const form = FormApp.openById('YOUR_FORM_ID');
  ScriptApp.newTrigger('onRegistration')
    .forForm(form)
    .onFormSubmit()
    .create();
}

function onRegistration(event) {
  const responseId = event.response.getId();
  // Read the submitted answers, calculate the amount,
  // and call your protected server-side order endpoint.
  // Pass responseId as the unique client_txn_id.
}
This snippet creates the trigger and gives your integration a stable response identifier. Keep the PaymentSetu API request itself behind your protected endpoint so the API key is not exposed in Apps Script code shared with form editors or copied into the browser.
4. Verify the payment and update the registration
After the respondent pays, PaymentSetu checks the transaction in your connected merchant account and matches the UTR and amount to the order. Your webhook endpoint should then:
- Verify the HMAC signature before trusting the payload.
- Find the row using
client_txn_id. - Confirm that the order and amount are the expected ones.
- Change the row from
pendingtopaidonce. - Store the transaction reference and verification time.
- Make the handler idempotent so a retry does not create a duplicate registration.
Your application can also query GET /api/order_status/{client_txn_id} when a respondent asks for an update. The goal is a clear chain: form response → unique order → UPI credit → verified webhook → paid row.
Step 4: Match payments to Google Sheets rows
Add these columns to the response sheet or to a separate reconciliation sheet:
| Column | What to store |
|---|---|
| Response ID | The Google Forms response ID used for the order |
| Registration reference | Your human-readable reference |
| Amount expected | The amount calculated from the registration |
| Payment status | pending, paid or a review status used by your team |
| UTR | The verified transaction reference |
| Verified at | Date and time of the webhook or manual check |
| Payment link | The unique link sent to the respondent |
Do not overwrite the original form answers. Keep the payment columns separate so you can audit what the respondent submitted and what your payment system verified.
For a manual QR workflow, enter the UTR after checking your merchant account. For the dynamic workflow, let the webhook write the UTR and status. If a respondent says they paid but the row is still pending, search by the order reference and amount, then use the order-status endpoint or your dashboard rather than approving from a screenshot.
Step 5: Choose the right setup for your use case
| Method | Best for | Payment matching | Cost and effort |
|---|---|---|---|
| PaymentSetu dynamic QR + webhook | Repeat registrations, variable prices and paid-only access | Automatic UTR and amount matching to a unique order | PaymentSetu plan; one-time integration work |
| Static UPI QR + UTR field | Small, fixed-price forms | Manual check in your merchant account | Free QR; manual reconciliation |
| Confirmation message with payment instructions | Very small tests or informal collection | Manual and dependent on the respondent following instructions | Fastest to add; weakest record linkage |
Use the static QR when you are comfortable checking each payment. Move to a dynamic QR when you need every form response to have its own payment reference, or when a webhook should unlock a class, event ticket, service appointment or digital delivery.
If your business already runs on WooCommerce, the PaymentSetu WooCommerce plugin can provide a more direct checkout flow. For hosting renewals and invoices, see the best WHMCS payment gateway guide. A Google Form is most useful when the registration questions are the main part of the customer journey.
Templates for common registrations
Event registration
Ask for name, email, mobile number, ticket type and accessibility or meal details. Use one fixed amount per ticket type, create one payment order per response and only issue the final confirmation after the webhook marks the row as paid.
Course or workshop enrolment
Ask for the learner’s name, email, selected batch and a contact number. If batches have different prices, calculate the amount from the selected option on your server. Send the payment link after submission and keep the form response ID with the enrolment record.
Club or community membership
Collect the membership tier and the period being purchased. Display the payment status separately from the form answers so a person can correct a registration detail without making the same payment look like a second one.
In each case, explain the next step plainly: the form records the request, and the payment is confirmed only after the UPI transaction is verified.
Troubleshooting Google Form payments
The form response is saved but no payment link is sent
Check that the form-submit trigger is installed for the correct form and that the respondent email is being collected or entered. Review the automation execution log, confirm that an amount was calculated, and check that the protected order endpoint returned a payment link.
A respondent paid but entered the wrong UTR
Do not approve from the typed value. Search your merchant account by the expected amount, date and payer details, then record the verified UTR against the correct response. For future forms, make the dynamic order link the primary payment route.
Two people paid the same amount
Amount alone cannot identify the correct response when several people pay the same price. Use a unique client_txn_id and dynamic QR per response; the webhook can then update the intended row instead of relying on amount and timestamp alone.
The webhook arrives more than once
Make the handler idempotent. Store the event or transaction reference, ignore a duplicate for an already-paid order, and keep the original verification time instead of creating a second registration.
FAQ
Can Google Forms collect UPI payments directly?
No. Google Forms collects answers, but it does not natively verify a UPI transfer. Add a static UPI QR for manual checking or connect the form submission to a payment-verification service with a unique order and webhook.
How do I add a UPI QR code to a Google Form?
Generate a QR using your UPI ID, merchant name and amount, download it, and add it as an image in the form’s payment section. Ask for the UTR after payment, but confirm that reference against your own merchant account before marking the response paid.
How can I verify Google Form payments automatically?
Create a unique order for each submitted response, use its response ID as the order reference, and send the respondent a dynamic QR or payment link. PaymentSetu matches the UTR and amount in your connected merchant account and sends an HMAC-signed webhook that your system can use to update Google Sheets.
Is a payment screenshot proof of payment?
No. A screenshot is only a claim or supporting detail. Approve the registration only after the UTR and amount match a credit in your own merchant account.
Which PaymentSetu plan is suitable for a small Google Form?
PaymentSetu Starter costs ₹399 per 30 days and includes 100 credits, where one credit equals one successful payment verified. It includes dynamic QR generation, webhooks, API access, a unified dashboard and real-time notifications.