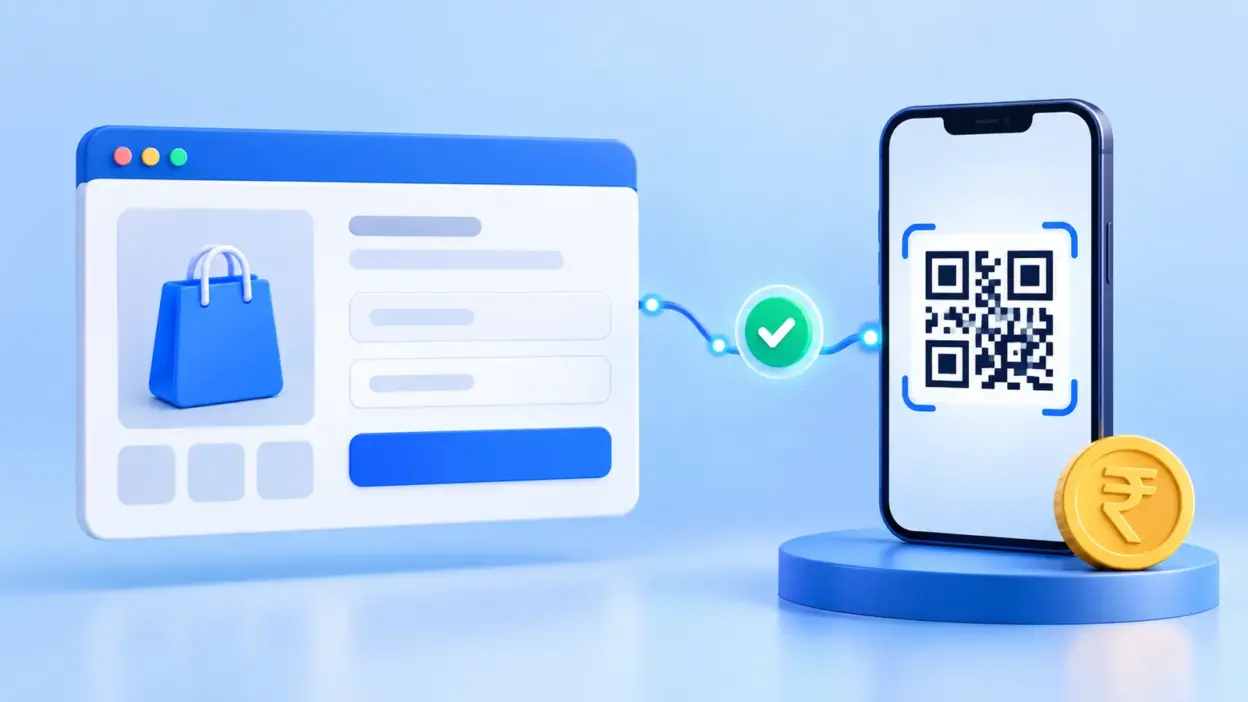
Payment gateway integration in html website can be simple: start with a UPI link or QR, then add one small server endpoint when you need automatic verification. This guide shows a plain HTML checkout that sends money straight to your own UPI merchant account and uses a webhook to confirm the matching order.
If you want zero commission on payments and up to 100 successful payment verifications, PaymentSetu Starter is ₹399 per 30 days. PaymentSetu is a payment verification service, not a payment gateway: the customer pays your connected merchant account, while the service matches the UTR and amount to your order and sends your webhook.
What you need
Prepare these items before editing your website:
- A plain HTML site served over HTTPS.
- A UPI merchant account that you can connect to PaymentSetu. The active connectors are Paytm Business and PhonePe Business.
- A public HTTPS URL for a small PHP endpoint, or a serverless function that can make outbound HTTPS requests.
- A PaymentSetu API key and a webhook signing secret from your account.
- A place in your database or order file to store
client_txn_id, amount, order status and UTR.
If your site only needs a payment button and you will reconcile payments yourself, use the manual route below. If an order should be released automatically, use the dynamic route and never treat a customer’s screenshot as payment proof.
Step 1: Choose manual or automatic verification
Why this matters: static HTML can display payment instructions, but it cannot safely keep an API key or verify a bank transaction in the browser.
There are two separate jobs:
- Collect payment details: a UPI link or QR can pre-fill the payee and amount.
- Confirm payment: a backend must receive a trusted status event, match it to your order and then deliver the product or service.
NPCI describes QR, intent, application-based and collect as merchant integration modes. Its FAQ also explains that a QR can contain the merchant UPI ID and amount, so the payer sees those details after scanning. Read the NPCI UPI FAQ when deciding which merchant flow suits your account.
For a brochure site, booking enquiry or one-off invoice, manual QR may be enough. For digital downloads, course access, hosting renewals or an online store, dynamic QR plus automatic verification is the safer design.
For a simpler link-only implementation, see our guide to creating a UPI payment link. If you are comparing architectures, accepting UPI payments on a website without a gateway explains the same direct-to-merchant model at a higher level.
Step 2: Add a free UPI link or QR
Why this matters: you can launch a static payment option without adding a database or backend.
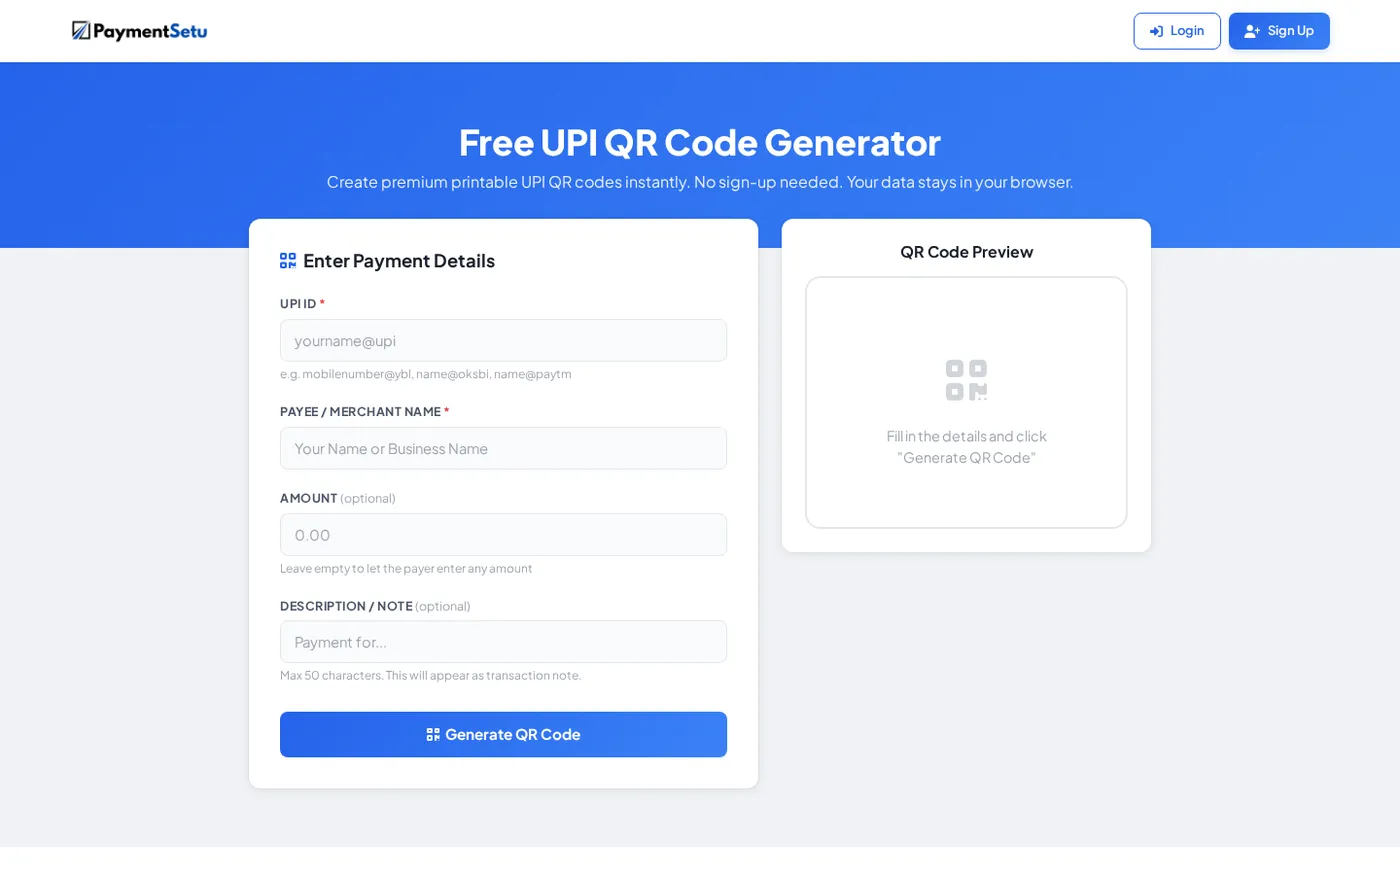
Create a QR with the free UPI QR Code Generator. Enter your UPI ID, business name, and either a fixed amount or no amount. Download the PNG and place it beside the product or invoice. The generator runs in the browser, so it is useful for a simple static page.
For a mobile visitor, you can also add a UPI deep link. Replace every placeholder with your own values and URL-encode the business name and note. Set the destination of a normal page link to this URI and use “Pay ₹499 by UPI” as its visible label:
upi://pay?pa=YOURVPA%40provider&pn=YOUR%20BUSINESS&am=499.00&cu=INR&tn=Order%201002The upi://pay link may open a compatible UPI app on a mobile device; a desktop browser may do nothing. Keep a QR or a “pay from another device” instruction beside it. NPCI’s published merchant ecosystem circular documents the deep-link parameters and transaction-reference considerations.
Success looks like this: the customer can see your merchant name and amount in the UPI app, and your team can match the UTR and amount in the merchant account before fulfilling the order. This route does not, by itself, update your HTML page automatically.
Step 3: Add the dynamic-order button
Why this matters: a unique order ID lets the verification service associate one payment with one customer order.
Add a form to your existing product or checkout page with these controls: an item field with the ID item and default value Website consultation; an amount field with the ID amount, numeric validation, minimum 1, two decimal places and default value 499; and a submit control labelled “Show UPI payment”. Also reserve a status message with the ID payment-status, a hidden QR image with the ID payment-qr, and a reference message with the ID payment-reference. The browser sends only the amount and item reference to your own endpoint; it never sees the PaymentSetu API key.
  const form = document.querySelector('#pay-form');
  const statusBox = document.querySelector('#payment-status');
  const qr = document.querySelector('#payment-qr');
  const reference = document.querySelector('#payment-reference');

  form.addEventListener('submit', async (event) => {
    event.preventDefault();
    statusBox.textContent = 'Creating your payment order…';
    qr.hidden = true;

    const response = await fetch('/api/create-order.php', {
      method: 'POST',
      headers: {'Content-Type': 'application/json'},
      body: JSON.stringify({
        item: document.querySelector('#item').value,
        amount: document.querySelector('#amount').value
      })
    });

    const result = await response.json();
    if (!response.ok || !result.qr_url) {
      statusBox.textContent = result.error || 'The payment QR could not be created.';
      return;
    }

    qr.src = result.qr_url;
    qr.hidden = false;
    reference.textContent = `Reference: ${result.client_txn_id}`;
    statusBox.textContent = 'Scan the QR with any UPI app and complete the payment.';
  });
The normalised qr_url response in this example is produced by your PHP adapter. Keep the real response mapping in that adapter, not in public JavaScript, so a future API response change does not expose secrets or payment logic.
Step 4: Create the tiny PHP endpoint
Why this matters: the server is the only safe place for your API key, order creation call and price validation.
Save this as api/create-order.php. Store secrets in environment variables or your host’s secret manager; do not commit them to the HTML repository. The endpoint names below are the PaymentSetu REST paths. Copy the current request field names and authentication header from the API documentation in your PaymentSetu dashboard before going live, because those details can change independently of your page.
<?php
declare(strict_types=1);

header('Content-Type: application/json');

$input = json_decode(file_get_contents('php://input'), true);
$amount = filter_var($input['amount'] ?? null, FILTER_VALIDATE_FLOAT);
$item = trim((string)($input['item'] ?? ''));

if ($amount === false || $amount <= 0 || $item === '') {
    http_response_code(422);
    echo json_encode(['error' => 'Enter a valid item and amount.']);
    exit;
}

// Never trust a browser price for a real shop. Look up the item price here.
$allowedPrices = ['Website consultation' => 499.00];
if (!isset($allowedPrices[$item]) || abs($allowedPrices[$item] - $amount) > 0.001) {
    http_response_code(422);
    echo json_encode(['error' => 'The item price is not valid.']);
    exit;
}

$clientTxnId = 'html-' . bin2hex(random_bytes(12));
$apiKey = getenv('PAYMENTSETU_API_KEY');
if (!$apiKey) {
    http_response_code(500);
    echo json_encode(['error' => 'Payment API is not configured.']);
    exit;
}

// Use the exact field names shown in your current PaymentSetu API docs.
$payload = [
    'client_txn_id' => $clientTxnId,
    'amount' => number_format($amount, 2, '.', ''),
    'item' => $item,
    'webhook_url' => 'https://example.com/api/payment-webhook.php'
];

$curl = curl_init('https://paymentsetu.com/api/create_order');
curl_setopt_array($curl, [
    CURLOPT_POST => true,
    CURLOPT_RETURNTRANSFER => true,
    CURLOPT_HTTPHEADER => [
        'Content-Type: application/json',
        'X-API-Key: ' . $apiKey
    ],
    CURLOPT_POSTFIELDS => json_encode($payload),
    CURLOPT_TIMEOUT => 15
]);
$body = curl_exec($curl);
$httpCode = (int)curl_getinfo($curl, CURLINFO_HTTP_CODE);
curl_close($curl);

$decoded = json_decode((string)$body, true);
$qrUrl = $decoded['data']['qr_url'] ?? $decoded['qr_url'] ?? null;

if (!in_array($httpCode, range(200, 299), true) || !$qrUrl) {
    http_response_code(502);
    echo json_encode(['error' => 'The payment order response did not contain a QR URL.']);
    exit;
}

// Persist this pair in your order store before returning it to the browser.
// Store: client_txn_id, item, amount, status=pending.
echo json_encode([
    'client_txn_id' => $clientTxnId,
    'qr_url' => $qrUrl
]);
The sample uses X-API-Key and illustrative response keys so the security boundary is easy to see. If your dashboard documents a different header, payload or QR field, change those three mappings together. Do not make the browser call /api/create_order directly.
PaymentSetu also exposes GET /api/order_status/{client_txn_id} and GET /api/check_credits. Use the status endpoint for an operator-facing lookup or a controlled fallback; the webhook remains the event that should update an order automatically. A plan credit represents one successful payment verified. Starter is ₹399 per 30 days for 100 credits; Pro is ₹999 per 30 days for 1,000 credits.
Step 5: Receive and verify the webhook
Why this matters: the redirect back to your site is a browser event, not proof that money arrived. Verify the signed raw request, match the order ID and amount, then make the fulfilment action idempotent.
Create api/payment-webhook.php:
<?php
declare(strict_types=1);

$rawBody = file_get_contents('php://input');
$secret = getenv('PAYMENTSETU_WEBHOOK_SECRET');
$received = $_SERVER['HTTP_X_PAYMENTSETU_SIGNATURE'] ?? '';

if (!$secret || !$received) {
    http_response_code(401);
    exit;
}

$expected = hash_hmac('sha256', $rawBody, $secret);
if (!hash_equals($expected, $received)) {
    http_response_code(401);
    exit;
}

$event = json_decode($rawBody, true);
$clientTxnId = (string)($event['client_txn_id'] ?? '');
$amount = (float)($event['amount'] ?? 0);
$utr = (string)($event['utr'] ?? '');
$status = (string)($event['status'] ?? '');

if ($clientTxnId === '' || $amount <= 0 || $utr === '' || $status !== 'success') {
    http_response_code(422);
    exit;
}

// 1. Load the pending order by client_txn_id.
// 2. Compare the stored amount with $amount.
// 3. If already paid, return 200 without fulfilling twice.
// 4. Mark it paid and fulfil it in one database transaction.

http_response_code(200);
echo 'ok';
Use the exact signature header, JSON keys and success value documented in your account. Keep the raw body unchanged until after HMAC verification. The PHP hash_hmac reference documents the function used above; the PaymentSetu webhook secret and header name come from your PaymentSetu configuration.
Your success rule should be strict: known client_txn_id, exact stored amount, verified signature, successful status and a new UTR. Record the UTR and webhook event ID if supplied. If the same event arrives twice, return 200 after confirming it was already applied rather than creating a second fulfilment.
Step 6: Host it on shared hosting or a serverless function
Why this matters: a static front end still needs a public, private, HTTPS-capable execution point for the two server calls.
On shared PHP hosting:
- Upload
create-order.phpandpayment-webhook.phpoutside the public HTML folder if your host allows it, or protect every other file in that directory. - Set
PAYMENTSETU_API_KEYandPAYMENTSETU_WEBHOOK_SECRETin the host environment, not in JavaScript. - Confirm PHP cURL and HTTPS certificate validation are enabled.
- Point your PaymentSetu webhook setting at
https://your-domain.example/api/payment-webhook.php. - Replace
example.comin the create-order code with your real HTTPS domain.
On a serverless platform, deploy the same two handlers as separate functions. Put the API key and webhook secret in encrypted environment variables, and return a response quickly from the webhook after the signature and idempotency checks. Use your database for pending orders because a serverless function’s local filesystem is not a reliable order store.
Success looks like a public HTTPS endpoint that returns JSON, keeps the API key off the page, accepts a signed webhook, and can find an order after a page refresh.
Going-live checklist
Run one small real payment before sending customers to the page. Check each item:
- The amount comes from a server-side product lookup, not only from an HTML input.
- The QR or intent shows the correct merchant details and amount.
- A customer can pay from a phone while the website is open on another device.
- The order remains pending until a verified webhook arrives.
- A fake signature gets HTTP 401 and changes nothing.
- A repeated webhook does not fulfil the order twice.
- The UTR, amount, order ID and timestamp are stored for reconciliation.
- Your API key and webhook secret do not appear in page source, browser logs or Git history.
For a larger HTML shop, you can move to a ready integration later. PaymentSetu’s WooCommerce plugin handles the order-status connection without custom API work; the underlying principle remains the same: the customer pays your merchant account and the payment is verified before the order is updated.
Troubleshooting
The UPI button does nothing. Test the upi:// link on a mobile device with a compatible UPI app. Keep the QR option available because a desktop browser cannot open a mobile app on every device.
The QR is displayed but the order is not marked paid. Check that the webhook URL is public HTTPS, the API key and webhook secret belong to the same account, and the stored client_txn_id is the one sent when the QR was created. Review the webhook delivery record and your PHP error log.
The webhook returns 401. Verify the exact header name and signature encoding from your PaymentSetu dashboard. Calculate the HMAC over the untouched request body, not over a re-encoded JSON object.
The page says payment succeeded after a redirect, but the order is still pending. Keep the order pending until your server receives and verifies the webhook. A redirect can tell you where the customer’s browser went; it does not replace server-side payment verification.
The API says there are no credits. Check the account’s credit balance with GET /api/check_credits, then choose the plan that matches your expected successful verifications. Do not display a “paid” state just because order creation returned a QR.
FAQ
Can I add UPI payments to a website made with only HTML?
Yes. A static HTML page can show a UPI deep link or QR code. Automatic order confirmation needs a small backend or serverless function because API keys, price validation and webhook verification should not run in public browser code.
Is a UPI QR code enough for automatic payment confirmation?
No. A QR starts the payment but does not give your static page a trusted order-status event. Use a unique dynamic order and a signed webhook when fulfilment must happen automatically.
Can I use a UPI link on desktop?
You can place the link on a desktop page, but upi://pay is intended to hand off to a compatible mobile payment app. Include a QR code that can be scanned from another device and test the experience on the phones your customers use.
Does PaymentSetu hold the customer’s money?
No. PaymentSetu is a payment verification service, not a payment gateway. The customer pays directly to your connected Paytm Business or PhonePe Business merchant account; PaymentSetu matches the payment and sends the webhook.
Which PaymentSetu plan is suitable for a small HTML site?
Starter costs ₹399 per 30 days and includes 100 credits, with one credit representing one successful payment verified. Pro costs ₹999 per 30 days and includes 1,000 credits plus priority support; review the current pricing before choosing.
DONE add-upi-payment-html-website words=1823