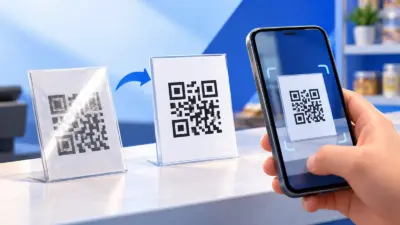

A UPI QR code with amount prefilled lets a customer scan and see the exact payment value in their UPI app. It is useful for a fixed-price item, ticket, fee or service, while orders with different totals need a new dynamic QR for each order.
When a fixed-amount QR makes sense
A fixed-amount QR is a QR code that includes your UPI payment details and a specific amount in Indian rupees. When the customer scans it, a compatible UPI app can open the payment screen with that amount already entered.
It works well when the same amount is collected repeatedly, such as:
- A ₹499 product pack or fixed service
- A class, event or workshop ticket
- A standard consultation or booking fee
- A membership fee with one published price
- A printed invoice for one known amount
- A donation or contribution amount that you want to suggest clearly
The QR is convenient, but it does not replace payment verification. Before treating an order as paid, check the payment in your merchant account or use an automated verification workflow. A payment screenshot alone is not proof of a successful credit.
For a reusable counter QR where every customer may pay a different value, leave the amount blank. The payer can then enter the amount in their UPI app.
What you need before creating the QR
Keep these details ready:
- The UPI ID (VPA) that should receive the money.
- The payee name that customers should see before confirming payment.
- The exact amount in rupees, including paise if required.
- An optional note, such as
Ticket,Fee AprilorInvoice 204. - A phone with a UPI app for checking the result before you print or share it.
Use the UPI ID connected to the account where you want the money to arrive. Type it carefully: a QR code can be scanned correctly and still send the payer to the wrong payee if the source details were entered incorrectly.
UPI is designed for payments through participating UPI apps. NPCI’s UPI product overview explains the payment system, while its merchant ecosystem guidance distinguishes QR flows where the customer enters the amount from dynamic QR flows that carry transaction details.
Step 1: Open the free UPI QR generator
Why: A browser-based generator is the quickest way to create a printable QR for one known amount.
Open PaymentSetu’s free UPI QR code generator. It does not require sign-up and lets you enter a UPI ID, name, optional amount and note before downloading the QR as a PNG.
What success looks like: You can see the form for the UPI ID, payee name, amount and optional note.
Step 2: Enter the payee details
Why: The payer needs to see the intended recipient before authorising the payment.
Enter your UPI ID in the UPI ID or VPA field. Add the name you want the payer to see, such as your shop name, clinic name or personal trading name.
Do not enter a phone number unless it is also the exact UPI ID you intend to receive money at. A UPI ID normally contains a handle after @, so check every character against your UPI app or merchant account.
What success looks like: The preview identifies the expected payee, and you have not used a sample address or a spelling variant by mistake.
Step 3: Add the fixed amount
Why: Adding the amount saves the customer from typing the value and reduces amount-entry mistakes for a fixed-price payment.
Enter the exact total in the amount field. For example, enter 499 for a ₹499 ticket or 1250.50 for a ₹1,250.50 service fee. Add a short note if it will help you identify the payment later, such as Workshop ticket or Invoice 204.
Keep the amount out of the note if you have already entered it in the amount field. The amount field is what pre-fills the payment value; the note is for context.
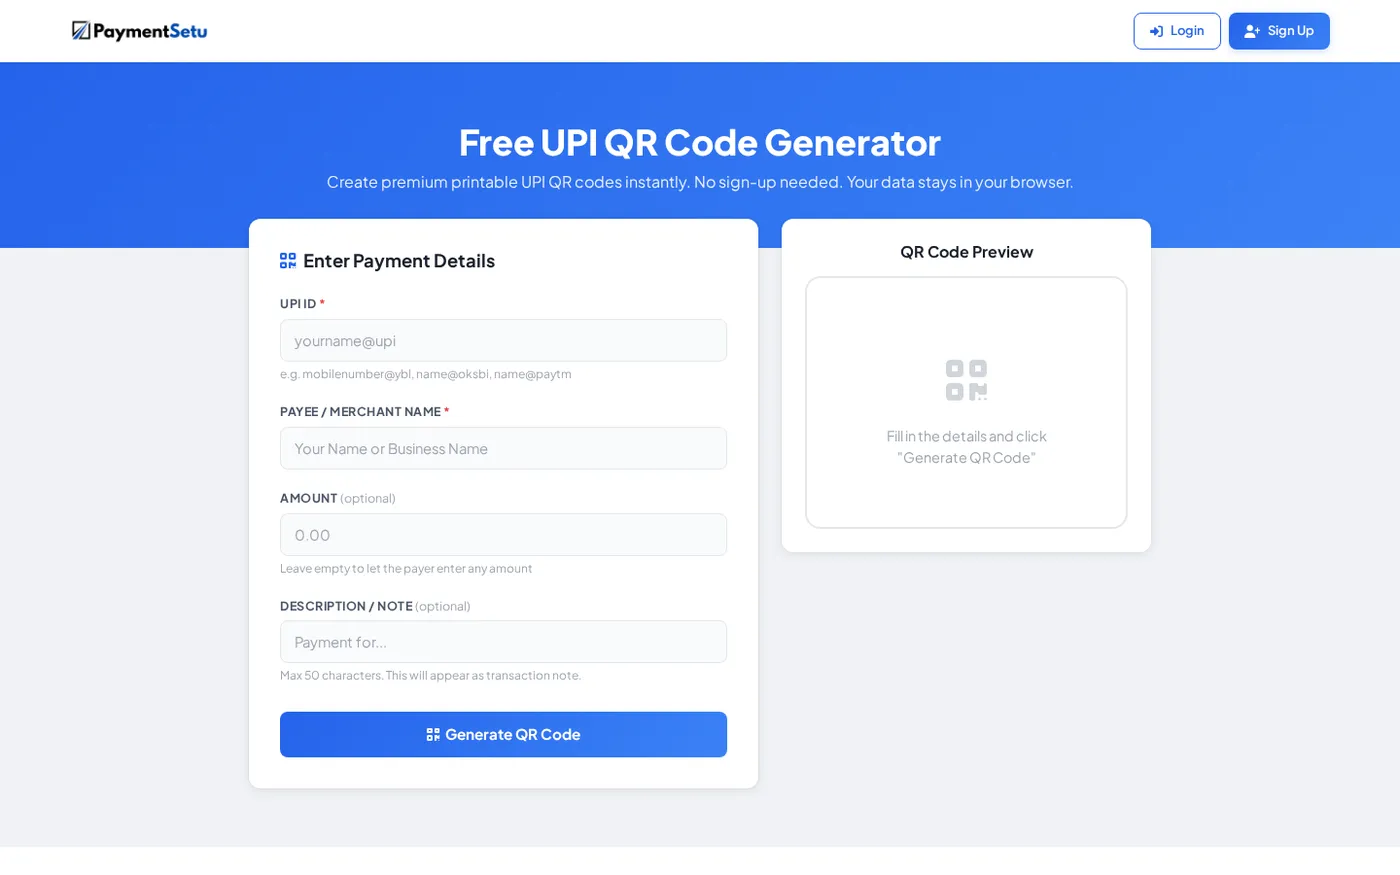
What success looks like: A QR preview appears with the fixed amount represented in the payment details. If the preview does not update, recheck that the UPI ID and amount fields contain valid values and that there are no extra spaces.
Step 4: Download and label the QR
Why: A clear label helps customers understand what they are paying and makes the code easier to use at a counter or on an invoice.
Download the PNG from the generator. If you are printing it, place the QR on a clean, high-contrast area with enough white space around all four sides. Add a nearby plain-language label such as “Scan to pay ₹499” and show the relevant product, ticket or fee name.
Do not crop the square edges, stretch the image, cover the QR with a logo or place it on a busy background. If you put the QR into a designed poster, keep the code large enough for the expected scanning distance.
What success looks like: The downloaded file opens normally, the QR is sharp, and the amount and purpose are obvious without making the customer guess.
Step 5: Scan and verify before sharing
Why: A short check catches a wrong UPI ID, payee name or amount before customers see the QR.
Open a UPI app on a different phone and scan the QR. Before entering your UPI PIN, confirm all three details on the payment screen:
- The payee name is yours or the business receiving the payment.
- The amount is the intended fixed value.
- The note or reference is readable if you added one.
Cancel the payment if any detail is wrong. If you need a full end-to-end check, make a small, intentional test payment only when you are ready to reconcile it in the receiving account. Never ask a customer to rely on a payment screenshot instead of checking the actual credit.
What success looks like: The scan opens the right payment screen with the expected payee and amount already present.
Can the customer change the amount?
Usually, the amount is prefilled rather than magically locked. The QR carries a requested amount, but the exact controls shown to the payer can vary by UPI app and payment flow. The payer may be able to edit the amount, or the app may ask for an additional confirmation.
That is why “fixed amount” should mean “the amount is entered for the payer in advance”, not “the payer can never change it”. Put the amount next to the QR, ask the customer to check the payment screen, and verify the amount received before fulfilling the order.
If you need to collect a different total for every invoice, do not print one fixed-amount QR for all orders. Create the QR from the current order total or use a payment workflow that generates one dynamic QR per order.
Fixed-amount QR vs per-order dynamic QR
The right choice depends on whether your prices change at payment time.
| QR type | Amount shown after scanning | Best for | Typical setup |
|---|---|---|---|
| Reusable QR without amount | Customer enters it | Tips, open-value counter payments and variable contributions | Create once and display it |
| Fixed-amount QR | One amount is prefilled | Tickets, standard fees, fixed packages and one-price services | Create one QR for that amount |
| Per-order dynamic QR | The current order total is generated | Online carts, invoices and bookings with different totals | Generate a fresh QR for each order |
For a website checkout, a per-order QR is safer for reconciliation because the amount and order reference are created together. It also avoids asking the customer to type a total from a web page into a separate payment screen.
PaymentSetu is a payment verification service, not a payment gateway. The customer pays directly to your own Paytm Business or PhonePe Business merchant account; PaymentSetu matches the UTR and amount to the order and sends a webhook to your store or application. You can create a PaymentSetu account when you need automatic verification for changing order totals.
For WooCommerce or WHMCS, use the relevant PaymentSetu integration instead of making customers reuse a printed QR for different invoices. For a simple fixed-value invoice, the free invoice generator with UPI QR can place the QR on the document.
Troubleshooting a fixed-amount QR
The QR scans, but the wrong payee appears
Stop before entering the UPI PIN. Check the UPI ID character by character in the generator, create a fresh QR and scan it again. Do not distribute a code until the payment screen shows the intended payee name.
The amount is blank after scanning
Check that you entered the value in the amount field rather than only writing it in the note. Generate a fresh preview and try scanning from the phone’s UPI app; some camera apps only display the encoded text instead of opening the payment flow.
The amount is different from the printed label
Treat the payment screen as the source of truth. Correct the amount in the generator, download a new image and replace old printed copies so customers do not see two different instructions.
The QR is difficult to scan from a poster
Use the original downloaded PNG, keep a white border around the code and avoid stretching or compressing it. Test the final printed size from the distance at which customers will scan it.
FAQ
How do I make a UPI QR code with a fixed amount?
Open the free UPI QR code generator, enter your UPI ID and payee name, add the amount, then download the QR. Scan it yourself and confirm the payee and amount before sharing it.
Can I create a UPI QR code for ₹499?
Yes. Enter 499 in the amount field and add a label such as “Scan to pay ₹499” next to the downloaded QR. Always check that the payer’s UPI app shows ₹499 before authorisation.
Is a fixed-amount QR the same as a dynamic QR?
No. A fixed-amount QR pre-fills one value and can be reused for the same price. A per-order dynamic QR is generated with the current order’s amount and reference, which suits carts and invoices where totals differ.
Can I use the same fixed-amount QR for many customers?
Yes, when every customer is paying the same amount and you have a reliable way to verify each payment. If customers pay different totals, use an amount-free QR where they enter the value or generate a separate QR for each order.
Does a UPI QR code prove that payment was received?
No. A QR code only starts the payment flow. Confirm the credit in the receiving merchant account or use automated UTR-and-amount verification before marking an order complete.