Finding a payment gateway for individuals in India is difficult when you are a freelancer, tutor, creator or solo service provider without a registered company. You can start with a business merchant account and UPI collection instead of waiting to build a complex card checkout, then add automatic verification when your order volume grows.
What you need before you start
Decide what you are actually trying to do. A traditional payment gateway can bring cards, net banking and several payment methods into one checkout, but it also brings provider onboarding, merchant checks and integration work. Many individuals only need a reliable way to show an amount, collect UPI, and know which invoice or order has been paid.
Prepare these basics:
- Your legal name and contact details.
- PAN and bank details requested by the merchant-account provider.
- A clear description of what you sell: for example, design services, tuition, consulting, digital products or repair work.
- A simple page, profile or invoice that explains your service and how a customer can contact you.
- A refund or cancellation explanation that matches your service.
The Reserve Bank of India’s published framework describes KYC/AML checks and merchant onboarding as part of payment-gateway and payment-aggregator operations. That means “without a company” does not mean “without verification”. A provider may accept an individual, proprietor or unregistered business profile, but approval and requested documents are decided by that provider. Read the RBI’s published payment-system framework for the regulatory context.
Step 1: Can an individual get a payment gateway?
Why this matters: The words “payment gateway” cover several different products, and choosing the wrong one can make a small operation carry unnecessary setup work.
Action: Separate your need into one of these three routes:
- Occasional payments: Send an invoice or payment request and confirm the credit manually in your merchant app.
- Regular UPI payments: Use a business merchant account with a QR or payment link, then keep a simple payment register.
- Website or app orders: Use a dynamic QR and an automated payment-verification callback so the order changes state only after the payment is matched.
You do not necessarily need to incorporate a private limited company for the first two routes. You do need an account that the relevant provider allows you to use for collecting customer payments, plus the identity and business information requested during onboarding. Personal peer-to-peer UPI transfers are not the same as a merchant collection workflow: they do not identify an invoice automatically and are awkward to reconcile as your volume grows.
Success looks like: You can explain whether you need a gateway for cards and multiple methods, or a UPI-first workflow for your own services. For many freelancers and tutors, the second option is the simpler starting point.
Step 2: Understand what gateways usually ask for
Why this matters: A registration number is only one possible business detail. Passing onboarding depends on the provider’s current risk and KYC process, not on a generic claim that every individual is eligible.
Action: When you compare a provider, check these items before applying:
- Whether it accepts an individual, proprietor or unregistered business category.
- Whether your service type is allowed.
- Which identity, PAN, bank and address details it asks for.
- Whether you need a live website or can begin with links and invoices.
- Whether the money settles into your own bank or merchant account.
- What payment methods customers can use.
- Whether the pricing is per transaction, a recurring plan, or both.
- Whether the technical integration gives you a verified status or only a customer-submitted payment reference.
For example, Paytm for Business’s current onboarding form visibly includes business types such as proprietorship and unregistered, while its business pages describe online payments and payment links. That is useful evidence that incorporation is not the only profile a provider may consider, but it is not a promise of approval for every applicant. Confirm the live requirements during your own application.
Success looks like: You have a short checklist of documents and a written description of your activity. You are comparing the real collection flow, not just the word “gateway” on a pricing page.
Step 3: Use a Paytm Business or PhonePe Business merchant account for UPI
Why this matters: A UPI-first setup lets you collect into an account intended for merchant payments while keeping the payment relationship with your customer and your own merchant account.
Action:
- Apply for a Paytm Business or PhonePe Business merchant account through the provider’s current official onboarding flow.
- Select the business profile that accurately describes your situation. Do not submit a company type you do not have.
- Complete the provider’s identity, bank and activity checks.
- Create a QR or collection flow for the service you sell.
- Run a low-value test with a real customer or a clearly labelled internal test, and record the amount, UTR and invoice number.
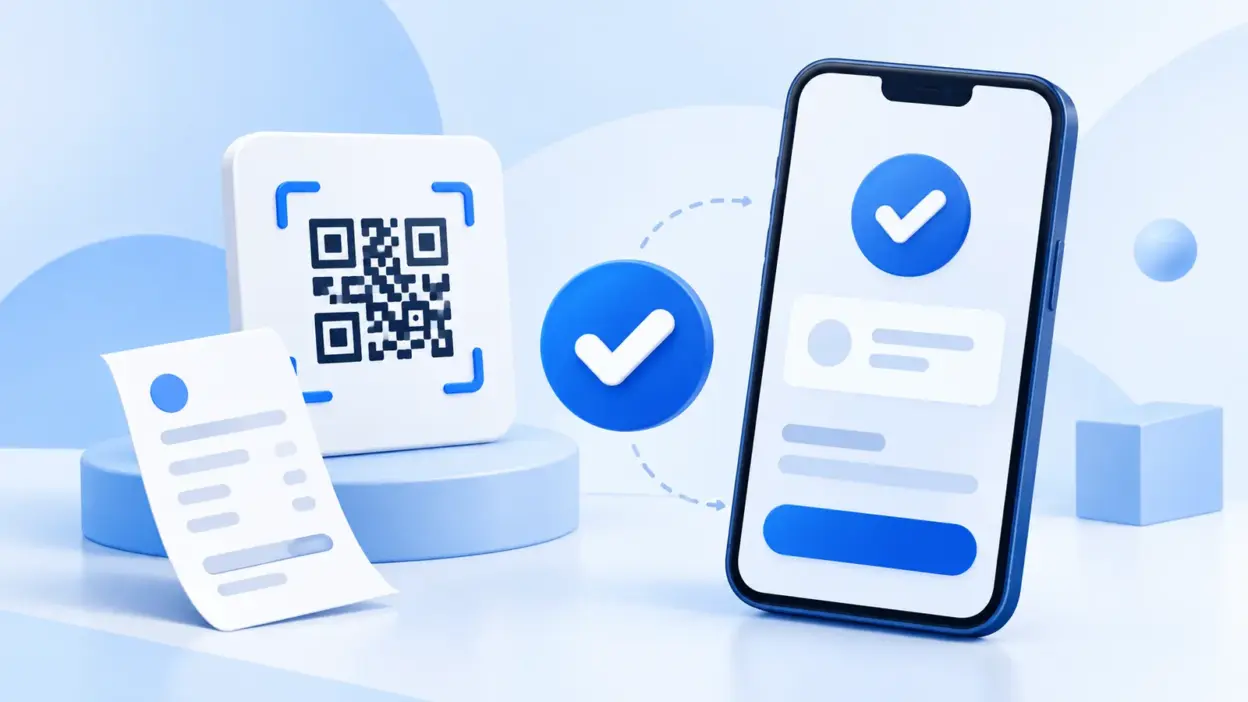
PaymentSetu connects with Paytm Business and PhonePe Business merchant accounts. The customer pays by UPI straight to your own merchant account; PaymentSetu then matches the UTR and amount to the dynamic QR or order and sends a webhook. It does not hold the money and is not a payment gateway.
| Route | Customer action | What you track | Best fit |
|---|---|---|---|
| Manual UPI collection | Pays to your merchant QR | Amount, UTR and invoice | Occasional work |
| Traditional payment gateway | Uses a hosted or embedded checkout | Gateway status and settlement report | Cards and multiple payment methods |
| PaymentSetu with your merchant account | Pays the order’s dynamic UPI QR | Matched order plus webhook | Regular UPI orders and automated fulfilment |
Success looks like: A test payment appears in your own merchant account, and you can identify the matching invoice without asking the customer for a screenshot.
Step 4: Add automatic verification with PaymentSetu
Why this matters: A payment screenshot is a customer-provided claim. Your order system should rely on a matched payment status before you deliver a session, activate a service or release a digital file.
Action:
- Create a PaymentSetu account and connect your Paytm Business or PhonePe Business merchant account.
- Create an order with the customer amount and your own invoice or order reference.
- Show the generated dynamic QR to the customer.
- Wait for the payment to reach your merchant account and for the UTR and amount to match the order.
- On the verified webhook, mark the invoice or order as paid. Store your order reference and the provider transaction reference so your records can be reconciled later.
- Make your webhook handler idempotent: receiving the same event twice must not deliver the service twice.
The Starter plan costs ₹399 per 30 days and includes 100 credits. One credit represents one successful payment verified. It also includes dynamic QR, webhook and REST API access, a unified dashboard and real-time notifications, with 0% commission on payments.
For a custom application, keep the flow simple: create an order, check its status when needed, and use the signed webhook as the event that updates your system. Keep API keys private, accept callbacks only over HTTPS, validate the HMAC signature, and record the event before changing fulfilment status.
Success looks like: A customer can pay without sending proof, your invoice changes to paid only after verification, and repeated webhook deliveries do not create duplicate fulfilment.
Step 5: Send invoices with a UPI QR
Why this matters: Freelancers and tutors often collect by WhatsApp or email rather than through a full website checkout. A clear invoice gives the customer the amount, service description and payment instructions in one place.
Action:
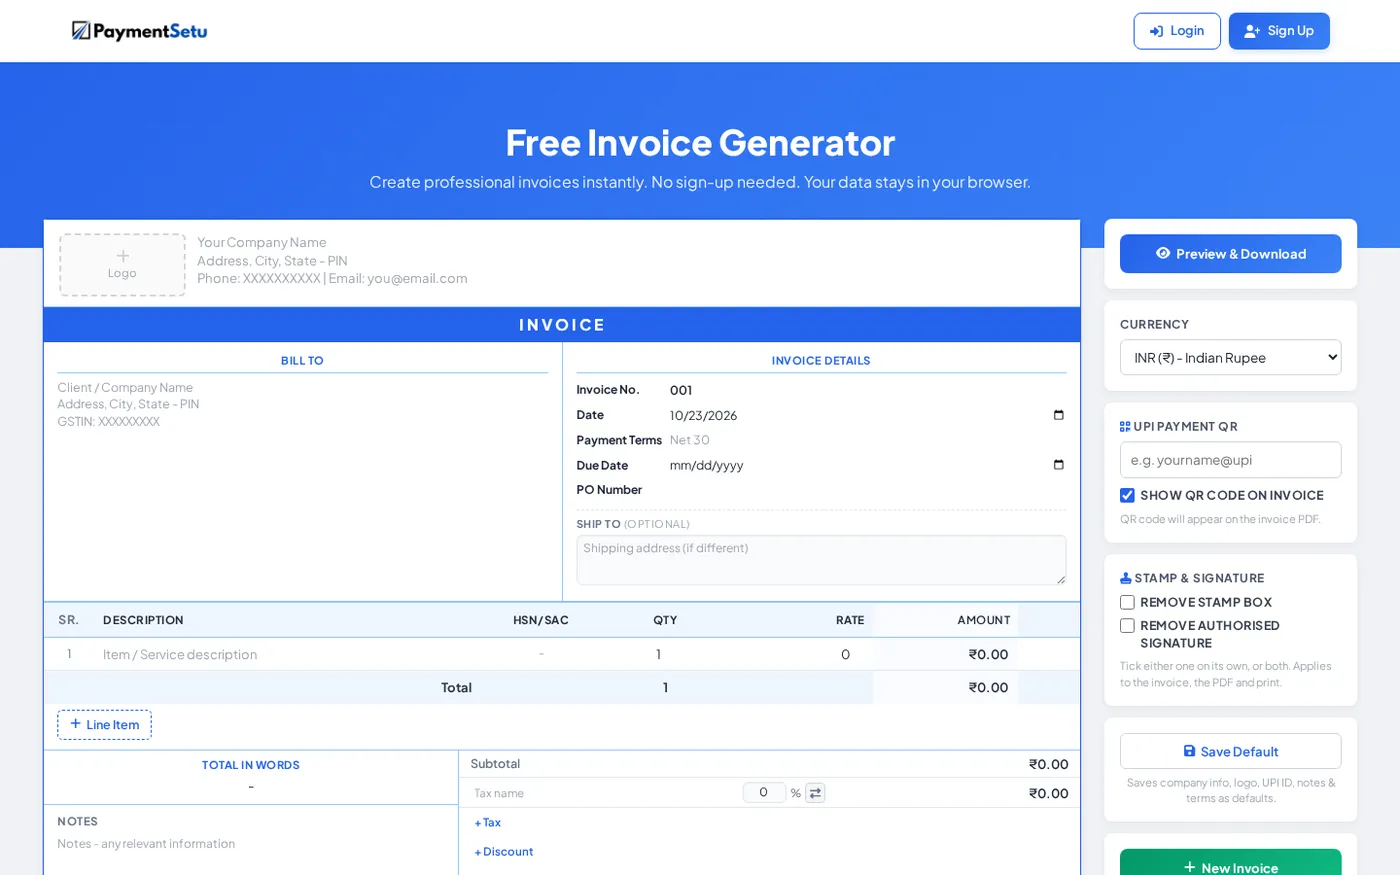
- Open PaymentSetu’s free invoice generator with UPI QR.
- Add your name or business display name, customer details, invoice number, line items and due amount.
- Add your UPI ID so the invoice can include a scannable QR.
- Check the amount and description before downloading the PDF.
- Send the invoice through your normal customer channel and reconcile the incoming credit against the invoice number.
The free tool needs no sign-up. It supports a UPI QR on the invoice, PDF download, HSN/SAC, tax, discount, shipping and 10+ currencies; the data stays in the browser. It is useful for a freelancer starting with invoice-based collection, while PaymentSetu’s dynamic QR and verification workflow is better suited to repeatable order status updates.
If you only need a printable QR for a counter, event or simple payment request, use the free UPI QR code generator. Use a separate invoice or reference for each service so that your records remain understandable.
Success looks like: The customer sees exactly what they are paying for, the QR points to the intended UPI ID, and the PDF gives you a clear reference for reconciliation.
Step 6: Choose the right plan for a freelancer or tutor
Why this matters: A recurring plan should match your number of successful verified payments, not an optimistic revenue target.
Action: Estimate the number of payments you expect to verify in 30 days, then choose the smallest plan with enough headroom:
| Plan | Price | Included verification credits | Suitable starting point |
|---|---|---|---|
| PaymentSetu Starter | ₹399 per 30 days | 100 | Freelancer, tutor or small shop with a modest payment count |
| PaymentSetu Pro | ₹999 per 30 days | 1,000 | Growing service business, WooCommerce store or WHMCS setup |
| PaymentSetu Business | ₹1,499 per 30 days | 100,000 | High-volume SaaS, service or multi-branch operation |
Starter is the practical first choice when you are validating an offer or collecting a limited number of monthly invoices. You can use its dynamic QR, webhooks, REST API, dashboard and notifications without adding a percentage to each payment. If you later need WooCommerce or WHMCS integration, PaymentSetu also provides plugins that work with a plan.
Do not confuse credits with rupees. One credit is one successful payment verified, regardless of the payment amount. A ₹500 tuition fee and a ₹5,000 consulting invoice each use one credit when successfully verified.
Success looks like: Your selected credit allowance covers your expected payment count, and you know whether you need only invoices or an automated website workflow.
Verify your setup before you share it
Run this short acceptance test before putting the QR on your profile or sending your first invoice:
- Create an order or invoice with a unique reference.
- Check the displayed name, UPI ID and amount on a second phone.
- Make a small test payment and confirm it reaches your own merchant account.
- Confirm that the UTR and amount are matched to the correct reference.
- Check that your dashboard and webhook show the same verified state.
- Replay the webhook in a test environment and confirm your fulfilment code remains idempotent.
- Export or record the payment reference so you can reconcile it with your bank or merchant statement.
UPI is the payment rail; your merchant account, invoice process and verification layer are the pieces that make it usable for a small business workflow. Keep those roles separate when explaining the setup to customers.
Troubleshooting common individual-payment questions
The provider asks for business details. Give an accurate description of your activity and select the closest permitted profile. Do not invent a company, GSTIN or address. If the provider’s current policy does not fit your activity, ask its support team what individual or proprietor route is available.
The customer sent a screenshot. Treat it as a payment lead, not final proof. Check the credit in your own merchant account and match the UTR, amount and reference before delivering the service.
The customer paid but the invoice is still open. Recheck the amount, UTR and selected merchant account. Keep the invoice reference with the payment record and use the provider or PaymentSetu status view rather than manually changing the invoice to paid.
I only sell through WhatsApp or Instagram. Start with a clear invoice and UPI QR. When the number of payments makes manual matching repetitive, move to dynamic QR and automatic verification.
FAQ
Can I accept online payments in India without registering a company?
You may be able to onboard as an individual, proprietor or unregistered business, depending on the provider and your activity. You still need to complete the provider’s current identity, bank and merchant checks, so do not treat “no company” as “no verification”.
What is the best payment gateway for a freelancer in India?
It depends on whether you need cards and several payment methods or mainly UPI. For a UPI-first freelancer workflow, a Paytm Business or PhonePe Business merchant account connected to PaymentSetu gives you dynamic QR and automatic verification into your own merchant account.
Can a tutor collect fees with a UPI QR?
Yes, a tutor can use an invoice with a UPI QR for straightforward fee collection, subject to the merchant provider’s onboarding rules. Give each learner or invoice a clear reference, and verify the incoming payment before marking the fee paid.
Does PaymentSetu hold the customer’s money?
No. The customer pays by UPI directly to the merchant’s own Paytm Business or PhonePe Business account. PaymentSetu matches the payment to the order and sends the verification result; it is a payment verification service, not a payment gateway.
How much does PaymentSetu Starter cost?
PaymentSetu Starter costs ₹399 per 30 days and includes 100 credits. One credit is one successful payment verified, and the plan includes dynamic QR, webhooks, REST API access, a unified dashboard and real-time notifications.